Making scenery: Linka Buildings
|
![]() | This is the apex of the roof on my church. On the right, you can see that I have made two chimney pots out of biro refill, and have attached these to the model with acrylic mastic, my new wonder-material. I found that the apex pieces for the roofs were unsatisfactory. They were small and difficult to cast and get out of the moulds without breaking, and the fit wasn't good. Instead, I glued a length of steel wire along the apex, and cut out lots of squares of thin bendy metal. The metal came from an old used tube of glue. The squares I then bent over the wire to make the shape you see here, and glued them in place, overlapping. You can just see the end of the wire. |
Here is another way of doing the apex of the roof, and yet another use of mastic. I have squeezed out a bead of mastic along the roof apex, and then added pieces cut from a drinking straw, overlapping each other. The mastic acts as glue, as well as gap filler. This method is very quick. The drinking straw I cut with scissors, into long strips each about a third of the circumference of the cross-section, so I got three strips out of one straw. I later painted the straw pieces white before painting the roof, to hide the blue stripes, and to blend the apex tiles with the rest of the roof. | ![]() |
![]() | Being a wargamer, I want my buildings to have removable roofs, and to be strong. Here you see yet another of the myriad uses of mastic. I have used the multipurpose goo to stick stout card to the insides of the Linka walls and roof. The mastic squeezes into every little recess of the Linka pieces, filling little gaps, and ensuring lots of contact with the card. Since the mastic dries flexible, this toughens the structure quite a bit. You may notice that some of the braces on the inside of the roof, the larger ones, are not perpendicular to the edges of the roof. The reason for this is that it is difficult to cut all the braces at exactly the proper angle, especially since the plaster parts of the roof are not in perfectly flat planes. Accordingly, I often cut my roof braces deliberately slightly larger than the right angle. If you cut them a bit too acute (pointy), they are useless, but if you cut them slightly too obtuse (blunter - a wider angle), then this is useful, because you can then turn them until they are at exactly the correct angle. |
Linka can be a bit tiresome to use for large roofs. They did once make vacuum-formed polystyrene moulds for large flat sections of roof. These, though, were not as sharply detailed as the main moulds. One cure for this problem is to make your own mould from latex, of a large flat section of roof. This saves a lot of time in the long run. Notice that I have left the teeth down the side edges of the large section of roof. This enables me to add extra roof pieces to my large one-piece casting, and if I don't want to add anything, it is easy to cut the teeth off and smooth off the edge. For more on making latex moulds, see the section on plaster casting. | ![]() |
I wanted to make a very fancy and complicated building, using layers of Linka pieces glued over the top of each other. I quickly realised that it would take me ages. Instead, I made just the one section of wall out of twenty-something pieces, and then made one of my first ever Gelflex moulds using it as a master. Gelflex is a soft rubbery substance I bought from my local model shop. It is a quicker way to make moulds than latex. I cut some of it up into lumps, put these in a small saucepan, and heated it on my cooker hob. All the while I stirred with a bit of wood, and wore safety goggles as the instructions advised. When the stuff had all melted, I poured it over the master, which I had surrounded with a retaining wall of Plasticine modelling clay. It bubbled for a bit, and then settled and cooled. I popped a lot of the bubbles before they congealed. |
![]() |
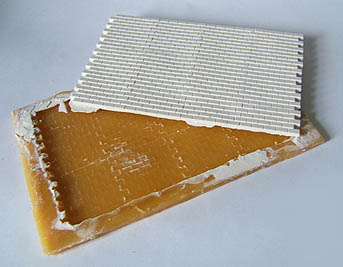
I was delighted to discover that the mould was a success, and had good detail and was easy to use. The original master, however, had suffered greatly from the heat, and broke into many pieces. The molten Gelflex is a lot hotter than boiling water. I also used this material to make a mould of a section of stairs (steps) that I had made out of lots of Linka triangular-section pieces glued onto a flat slab. To speed up production, I made a mould of four castings from a window mould of which I only had one original Linka mould. Not only did this mean I could cast four of them at once, but I could take them out of the mould much sooner, because the Gelflex rubber is much softer and more flexible than the material used for the Linka moulds. This meant I could take the castings out of the mould while they were still much damper and weaker. In theory, you can reuse Gelflex again and again, although I wonder if I will ever be able to bring myself to destroy a good mould and melt it down to make a new one. Since it is so soft, I imagine that the moulds will wear out fairly quickly, but unless I start casting commercial quantities, I don't see this as a limitation. I'm only casting a few for my hobby. 
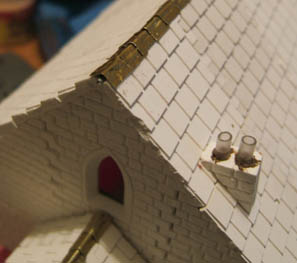
My last tip is on how to make the flat top on a tower. First, make the four walls of your square-section tower, and bring these up to a flat top edge. Next, turn the tower upside down and place it on a flat non-porous surface. Mix some plaster up, and pour it into the tower. The plaster will flow out along the bottom surface until it meets the side walls of the tower, which now act as the edges of a mould. You may have to press the tower down to get a good seal. Once dry, pick your tower up, and you'll find it has a perfectly-fitting flat top, to which you might like to add battlements, or whatever. BACK TO BUILDINGS MENU BACK TO SCENERY MENU BACK TO MODELLING MENU Click here to go back to the home page |