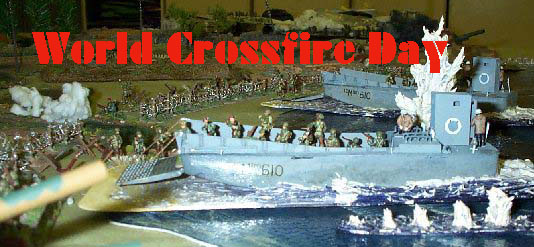
The Scenario Designs of World Crossfire Day This page is about the scenario designs for World Crossfire Day, but the ideas in it might be applied to all manner of wargame scenario designs, especially those set in conflicts like World War Two. I have played in role play games since I was eleven years old, and have a bit of a role player mentality when creating scenarios, and I also design games as a hobby, and so like to come up with scenarios that present new problems to the players. However, when you present a puzzle to a wargamer, he may not recognise it for what it is, especially if it is presented to him in a role-player sort of a way. Some players may have found my skulduggery annoying and unfair, and to them I apologise. I know that not everyone shares my way of thinking. Game #1: The defender got to deploy hidden. Hidden deployment is a great advantage in CF. However, there was a stranded Tiger in front of, not behind, his lines. At the game's start he had no reason to believe that the Tiger was his enemy's objective. It was just one of a few wrecks on the table. The thing he had to realise was that to win the game he would have to give up his hidden positions and advance. He was given insufficient forces that started on-table to advance against the Germans, but he was told that he could call on off-table reinforcements, but his brief reminded him that these reinforcements, if not used by him, could fight in other games (they did). The British player chose not to bring on his reinforcements. Perhaps he was role-playing an officer who had his mind on the big picture, and judged that it was not worth risking many resources to stop the Germans getting one half worn-out Tiger. Perhaps he was right. The Tiger later appeared in a later game, and was probably responsible for the high Allied tank losses in that game, but the Allies still won it. Game #2: The defender was given some resources to defend, which were on one side of the table. His opponent was given a scouting mission to carry out on the other side of the table. Possibly the defender would sit tight in his good defensive positions and do little to hinder the scouting mission. Possibly the attacker would fail to realise the importance of other things on the table and miss the opportunity to take them. As it happened, he did attack and took most of the objectives anyway. Game 12 was a very similar scenario, only exaggerated by a massive linear sight block (railway embankment) running down the length of the table, separating the table into two distinct halves, and making it all the more likely that the Allied scouting mission could advance and complete its mission without ever disturbing the Germans defending their objectives. However, wargamers are wargamers and want to shoot at each other, so the attacker advanced down both halves of the table at the same time. So in games #1, 2, and 12, the objectives of the two sides were not contrary. The defending side was told "defend X" and the attacker was told "attack Y", so in fact it was possible for both sides to follow their orders without bothering the other. Also, in all three games, the defender had to decide whether or not to become an attacker. Only by becoming an attacker could the defender win the game decisively. Many people dislike the standard meeting engagement scenario, because so few happened in reality. The snag with attacker versus defender games, though, is that everyone knows where they stand all the way through, and standard patterns of behaviour emerge (because they work) and these can become dull. One repeated theme in my scenarios was the awkward allocation of resources. In Game #3, the Germans could very easily retreat with all their infantry, but to do so would mean that their Tigers would be unsupported when they retreated. How many infantry should be risked to escort the tanks? In Game #13, the German commander had to decide how many men to use to repair the railway lines, and with how many to defend the town. In Game #10B it was how many to dig out the tanks, and how many to keep the enemy at bay while this went on. Of course, the problem has to be presented such that the player has some idea of how many men might be needed for the task, but a very imperfect idea. Indeed, abandoning the task had to be an option. I had to think of different ways that scenarios could affect one another. Simply using casualties suffered or inflicted I didn't think was good for several reasons (one being that it was a bit dull). The main reason was that if one side did well overall in the campaign (as happened), then later games would be hopelessly one-sided and short, because losses carried over from earlier in the campaign would mean that the smaller side would be tiny. Going the other way (adding extra forces to the winning side) was not a solution either, because it would require players to have access to potentially enormous numbers of figures. So, I went for things like the following: Artillery support (sometimes potentially lost, sometimes potentially gained). Minefields, and knowledge of enemy minefields (captured maps). Flank attacks – success in one game (seizing a bridge, or finding a ford, perhaps) might enable forces in a later game to be brought on from one side of the table as well, instead of just one end. Small amounts of extra tank support. Pill boxes and wire. The rationale here was that with more time, the Germans could have fallen back to their ideal chosen defensive positions, and these could have had pillboxes already built there. More time also might enable troops to lay out wire. Hidden deployment. I used this a LOT. The rationale was pretty much the same - the faster the Allies advanced, the less time the Germans would have to dig in or camouflage positions. Hidden deployment is the best way to slow down an attacker, and speed of advance was the thing that gave the Allies most of their advantage on this campaign. Game #5 was just a nasty trap for the attackers. In WW2 a favourite tactic by the Germans was to draw the Allies forward to zeroed-in positions and stonk them. If the Allies advanced quickly, as was their brief, they would have been through the danger area by the time the artillery landed, and they were given the men and half-tracks to help them, but wargamers are wargamers, and they like to attack things... Withdrawing in CF can be done very easily (retreat moves and unlimited move distances), so withdrawal scenarios don't really work (nor chases) if you do them straight. The German defender in this game had the problem of pretending to be forced back, and withdrawing at a controlled speed. To make it harder for him, I gave him a really good defensive position right in the danger-area of the board. Withdrawing from that would look very suspicious. [Note that I wrote this scenario many years ago, and adapted it for WCFD, and one change was that I swapped the roles and made the Germans the defenders.] Game #6 was written for someone who seemed to have quite a liking for the dramatic. His figure painting style is flamboyant and he has figures for zombies and alien worlds. He had figures for the French resistance, two downed airmen, commandos, and terrain for a really nice aerodrome. I was itching to use these. I came up with loads of fiendish ideas. One was that a double agent working for the British was going to be flown out of the aerodrome, and that the scenario would involve the British apparently trying to stop the man 'escape' in an aircraft while actually being desperate that he DID escape, and then the French resistance, who could not be trusted enough to be let in on the secret, potentially ruining the plan by actually trying to stop the agent. This, though, required three players. I had many other ideas, but these required an umpire, and there were only two people involved in the game. It looked as though it would be a dull (well, dull for the scenario writer - I suppose 'conventional' is a fairer word) attacker versus defender raid on an airbase. Luckily, the host of this game found another player, and so he could umpire it. One thing I put in role-play scenarios all the time is an opportunity for players to make a big mistake. Avoiding the mistake is very easy. I added a load of tanks turning up on the base. All the commandos had to do was keep quiet and wait for the tanks to drive off again. BUT wargamers are wargamers! If there are tanks on the table then I'm meant to destroy them, right? In this case, the commandos not only attacked but destroyed two Panthers! Had they not done this, they would have observed a senior SS officer climb out of one tank, with a dossier of important information on him, and enter the camp, hoping to be flown out. If captured, he was worth lots of points, the dossier's information was useful too, and he would not have been present as a BC+2 in the climactic Game #16. As it was, he and the dossier burned in the tank. The umpires of the games were told only what they needed to know about their own games. In this scenario, the French resistance turned up, controlled by the umpire who gleefully got them to mistake commandos for Germans, and when the commando officer (is there ANY photograph of real commandos wearing woolly hats in battle?) talked to them, they told him of two targets. The commandos had orders to hold the airfield until relieved, but the resistance had enough time and resources to attack ONE of the two. One was a train being loaded up with parts for a new secret German super-weapon. Another was a radar station that was still operational, and that the Allies knew nothing about (never spotted from the air). The umpire presented the choice to the Allied player, and the player picked the train. The umpire didn't know which was the better option, and so was in no position to give hints. I was glad that the train was picked for three reasons (1) it made Game #13 more interesting, and harder for the Germans to win (they were expected by its umpire to have an easy time of it), (2) it balanced the campaign, because the Allies were winning, and (3) it was the WRONG choice! The Germans had another train with which they could still win Game #13 (and they would have lost either way as it turned out, because they never repaired the line on which both trains had to run), but this was the only opportunity in the campaign that I wrote in for the Allies to get rid of the radar station and it had a much further reaching influence on the game-affecting Allied air cover in a few different scenarios, making it harder for Allied air liaison officers to call in air-strikes, and crucially affecting the die roll for bombing the German forces in Game# 16. Game #7A was about two main things: disrupting enemy communications and taking a bridge. Enemy communications might give warnings to troops to get to a certain place quickly and prepare for an attack (hidden deployment), tell troops already in a place that they were about to be attacked (Game #10B had troops blithely unaware that they were about to be attacked, caught busy digging out stranded tanks), and told troops counter-attacking of the presence of hidden German mines. I had a few HQs, radio rooms, and telegraph lines, and so there were a few opportunities for the Germans to communicate, but alas for them, every single HQ was either captured or burned by the retreating Germans, and most telegraph lines were cut. The Allied players in #7A were VERY keen wire cutters, and even though there was nothing in their brief about cutting wires, they cut the lines every five inches! The big idea with the bridge was this: BOTH sides were trying to preserve the bridge. I love writing for umpired games! The Allies were advancing as fast as they could to capture the bridge intact, and they could see the German engineers working at the bridge - to blow it up, surely? No - they were REMOVING the unstable explosives on the bridge that might be set off by the vibration of their tank column which was due any minute. Only once the tanks were across were the Germans going to blow the bridge. Balancing scenarios is of course difficult when they are as extreme as some of these were. The Allies won an amazing victory in this game. They did this largely because they destroyed so many tanks. They destroyed them largely with Typhoons. They only had four Typhoon strikes, and I thought that these would have been used up long before the German armoured column arrived. I was wrong. Now, the German players in the campaign might complain that the scenario was unfair because, since there were so many German tanks in it, there was a great opportunity for the Allies to earn lots of points. This was true, but the column of tanks I put into this game was so very strong that I was confident that it could cross the bridge and charge off-table again soon afterwards. The tanks had one motivation: escape. To hang around was to risk being destroyed. By putting so many tanks in the column, I was ensuring that they would be on-table for not long enough to do the poor Allies harm, nor to be destroyed. How was I to know that a Cromwell would position itself astride the road and knock out half the convoy? In Game #8 the Allies suffered a major reverse. It is possible that this was in part because I did not make some things about the terrain set-up clear enough, but it seems likely that it was as least as much due to fear on the part of the attackers, who, having been hit with HE shells fired by AT guns in the three forts that were their objectives, concluded that any movement for the rest of the game in LOS of these guns was too great a risk. The attacking player didn't know that I had limited every AT gun to two HE shells. I did that to balance the scenario, also because it was fairly realistic (an HE attack in CF does not have to represent literally one shot - it could be several shots), and because I thought that the scenario was more interesting if it was about infantry manoeuvring around the place with the forts as objectives, rather than if the objectives themselves were the main playing pieces for the defenders. Game #9 was the first of three chess clock scenarios. I get the impression from reports that players new to chess clocks appreciated how well they work in making a scenario more tense and pacey. I may be wrong but I think I was the first person to try CF with a chess clock. I particularly wanted to use chess clocks in this campaign because one of the purposes of this event was to publicise CF, and CF is one of the few wargames that works well with a chess clock, and I see that as one of its strengths that I would like people out there to know about. Game #10 was mostly fairly conventional attacker versus defender. The German forces were deployed outside a town, populated by many Vichy collaborators and Third Reich administrators and other civilians who might not be keen on being 'liberated'. The attacker and defender both were given an opportunity to make a mistake. A friendly company of British appeared during the game, bound for a different action elsewhere (Game #17). The attacking Allied commander could have taken these forces and used them up in his game. In the event, he took one platoon of them and let the rest march across and off the table. I was thinking of using this idea a few times but didn't, largely because of issues of fairness. One variation was fuel lorries driving by that could be used to refuel on-table vehicles, but if so used, would mean that in other games, tanks would start running out of fuel. The defending German commander was (shortly AFTER the extra Allied company turned up - I can be cruel) given a message from an off-table non-player commander in the town, asking him for a decision: (a) decide that the current situation is fine, and that everyone should hold where they are, (b) decide that the situation is not fine, but not hopeless and summon the last members of the town's garrison and with the aid of these hold off the attackers (a drawback being that there would be no one left to police the town), or (c) decide that thing are hopeless, and leave the town entirely. The player chose (c). The umpire who asked him for this decision did not know its consequences either, so could not have led him towards a 'correct' answer. The consequences were that the roads east of the town became choked with fleeing civilians, severely hampering the German withdrawal. In overall campaign terms, it was probably the worst of the three options. Games #1 and 15 also used the chess clock. One advantage of chess clock scenarios for me running the event, was that I could be pretty confident of how long they would take, and so when I could expect a report. If one side has one hour on the clock, and the other has forty minutes, then the game cannot last more than 1 hour and forty minutes, right? I had not factored in beer and loo breaks! Chess clocks can be used to bring a game to a conclusion in several ways. One is to lower morale of troops. CF has no morale system, and troops can normally be suppressed and rally and infinite number of times and still be as fresh as warm milk. When a flag falls in a chess clock game, troops can degrade one class. Green troops run away or freeze after one flag fall, while veterans will last two falls of flag (but not as veterans) before running. Game #18 was of a type that works best in this sort of campaign: the British had an infinite number of troops to call on, and the German defenders had a fixed number. The question was how long the Germans could hold out for. I think now that I should have had a couple of these early on in the campaign, for giving a measure of the speed of the Allied advance. A German victory is possible if the Allied time penalty and losses are high enough. Game #16 was the climactic game of the campaign: the retreating Germans caught in a bottle-neck. Games #17 and 18 were always going to finish too late to affect it. It was a major design challenge. I felt the need for an epic show-down at the end of the campaign, but I had to make the game playable in a few hours. Each of the other games was typically two companies a side with a bit of support, which in the scale of a major WW2 operation makes them quite small actions. I wanted people to feel part of a major operation. If the campaign operation were large, then the number of Germans caught in the Allied net would be great - certainly well into the thousands even if this was not meant to be the Falaise Gap itself. This meant that the climactic game would at CF scale be gargantuan and unplayable in a reasonable time. If the forces involved depended on early successes in the campaign, then the fact that by this point as it turned out the Allies were well ahead meant that the German player would be hopelessly out-numbered - but the salient at the point of German exit would have been packed with Germans forces. Indeed, the better the Allies did in trapping the Germans, the more Germans there would be there. I wanted the actual neck of the salient to be in the climactic game, so that the numbers of escaped and trapped Germans could be quantified. It would also look good in the photo's. I also did not want the complication of having to design several possible ending scenarios, only one of which would be used, to take into account all possible results of earlier games. So, I needed a design in which both sides had reasonably compatible-sized forces varying no more than other forces had in previous scenarios. I also wanted the overall success of the operation to influence this one, though. This was the last scenario I wrote, because I wanted to have written all the others first. I must thank this game’s local organiser for his patience. He got the main bulk of the scenario only some 48 hours prior to the game, and then a few more e-mails with additions, alterations, clarifications and the like, so he had a lot to take in at short notice. I decided that the total forces that the players got to play with would not alter with the overall Allied success. Instead, the general success of the campaign up to this point would influence other things, like time, and die roll numbers. I also decided that I wanted LOTS of stuff on the table. This had to look like a massive operation. I chose Game #16 for the climactic game largely because it was to be played with 10mm figures, which I thought would look good, and the list of available figures listed a shed-load of stuff. Even so, I then came up with a design that worked better with more, and the folks in Edmonton were able to borrow more figures. I came up with the notion of "inactive" units. These would be just sluggishly mobile victory point counters in the form of figures. The Allied brief would be to take as many of these prisoner as possible. I came up with rules for taking prisoners that involved surrounding them and rolling a die to see if they surrendered. The "surrender number" was going to depend on how well the Allies had done to this point. The base number was 4+ (50/50) and this got modified to 3+ because of Allied success. So, a group of surrounded inactive units would surrender on a roll of 3+. One way to avoid getting surrounded, however, was to deploy so bunched up at the point of exit that getting surrounded would be impossible. I needed to have the inactive units dispersed for the game to work. So, I introduced the constant threat of Allied bombers. Every Allied initiative, there was a risk (umpire rolls 1d6, on a certain result (6) a hit would be scored) that some Allied bomber spotted and destroyed a unit of inactive Germans. If this happened, nearby units would be very likely to be destroyed too (I think I wrote 3+ = destroyed). I did some calculations, drew a map with a zone of deployment for the Germans that cut down the table area a bit, and managed to contrive matters to make the magic blast radius to be a convenient one base depth. So, bunching up would be deadly. The numbers to be rolled for bombing depended on earlier game results. The Germans still had a working radar station in the area, and had conserved four out of five of their AA guns (hence 6 was a bomber hit). Exactly how many troops/vehicles these inactive bases represented was never nailed down. I had in mind that a different scale could be represented, with each base of infantry being perhaps a platoon - like Spearhead scale. At Dunkirk there were small units of British troops holding the perimeter, while tens of thousands of men waited around on the beach contributing nothing to fending off the Germans. Since these inactive units were not intended to fight, they could represent large bodies of men (and points!). Another number to work out was the roll to cross the bridge. My fist draft of the scenario had this at 4+. When we added in loads more figures, I then judged that this meant that the Germans had a very poor chance of getting their troops off-table fast enough. The chance to cross the bridge had to be far better than the chance in a given initiative of being bombed. I changed it to 3+ with a reroll after every success until a failed roll was the result. This gives an average of about 1.75 units leaving the table every German initiative, which would be more than enough to get all 46 inactive units off-table in 30 initiatives. 30 initiatives is, in my experience, the typical number of initiatives it takes for a game of Crossfire to have reached the decisive point when one side’s victory seems assured. So that was the basic set-up: a bottle neck (e.g. bridge over river), with a LOT (46 in the end) of bases of vehicles and troops dotted about the place, representing men who are hiding from the RAF and USAAF, and just wanted to get away. I described these as men sitting about, eating, chatting, sleeping in the sun, cooking, smoking etc., to contrast them with the active units. Each German initiative, inactive units got 1d6 move actions to move towards the bridge. How many men would be taken prisoner and how many would escape? The active Germans units would have to make sure that the British didn't swoop in and net prisoners. I had given the British some carriers, and I feared that this would make things too easy for them. In the event, the Germans seem to have put up a stout defence. The Allied player made the mistake of firing on some inactive Germans units. This had the effect of converting them into active ones (I had the idea of making an inactive stand spawn into a full platoon on being shot at – to give the Allied commander a swift lesson in the value of mercy). Other consequences from earlier games included: thanks to Game #12 the Allies could enter from two, not one, table edge. The Germans had one minefield (the mine store in Game #8 was not captured), and this was one minefield that the Allies didn't know about (the map got burned to ashes in Game #6). The German BC+2 who could have been there to help organise the defence of the retreat was killed in Game #6. Since all the bridges in earlier games were in Allied hands, not many German active units could deploy hidden. In the event, the German defence was very effective, and the Allies were unable to capitalise fully on their advantages. So many German units made it across the river to safety that this became a German victory. However, so great had been the Allied successes up to this point that the overall campaign still went to the Allies. |